
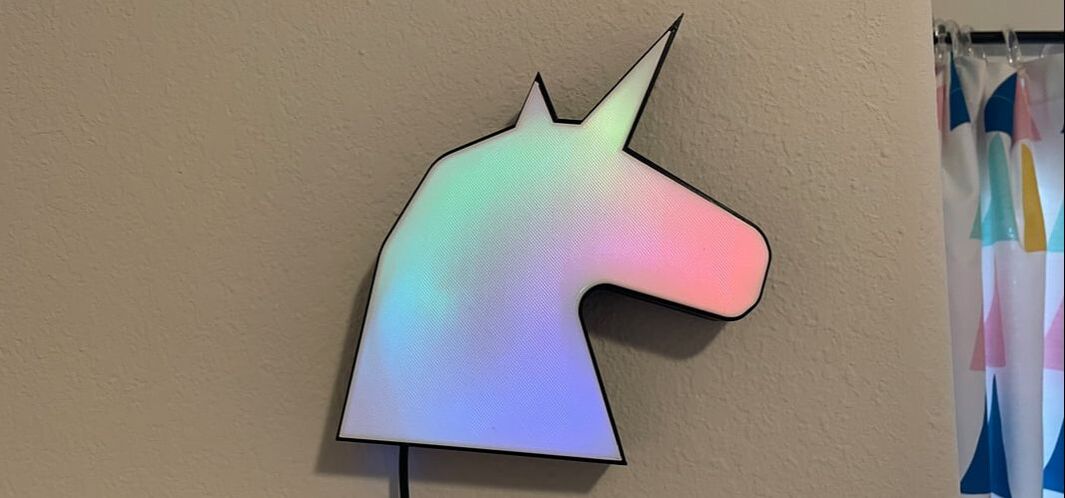
 In this quick guide, we'll show you how to easily make a Rainbow Unicorn Wall Light! All you need is a microcontroller, some ultra skinny neopixel strips from Adafruit, a 3D printer and two colors of filament. Let's get started!
0 Comments
(Tutorial) Make A Simple Thermostat With An Adafruit BMP280 Breakout and SAMD21 Microcontroller4/5/2021 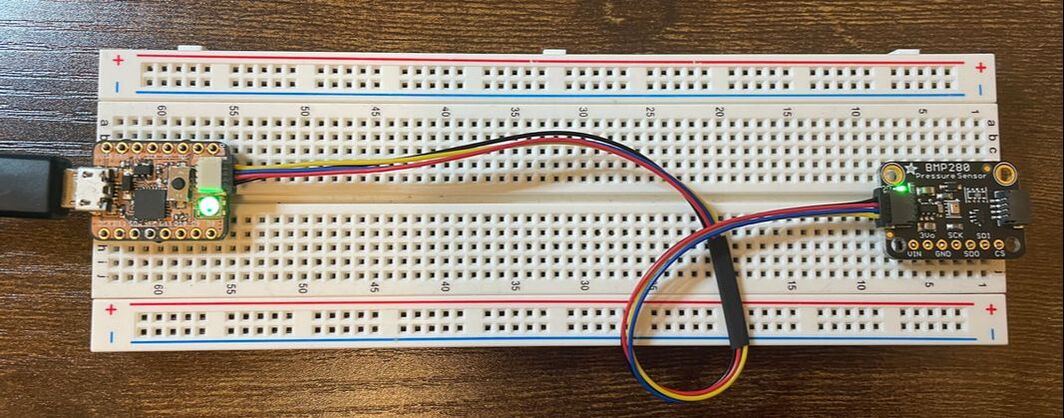
In this tutorial we will go over how to make a simple thermostat using the up coming CP Sapling Rev B and the BMP280 Pressure and Temperature sensor from Adafruit. This simple thermostat will display three simple colors to let you know what the temperature is inside you home or in a specific room. Let's get started!
As always before we get started, if you have never used a CircuitPython board like the QT PY, be sure to check out Adafruit's learning site to quickly get started with your new board. --> Adafruit Learning Site: Getting Started With CircuitPython 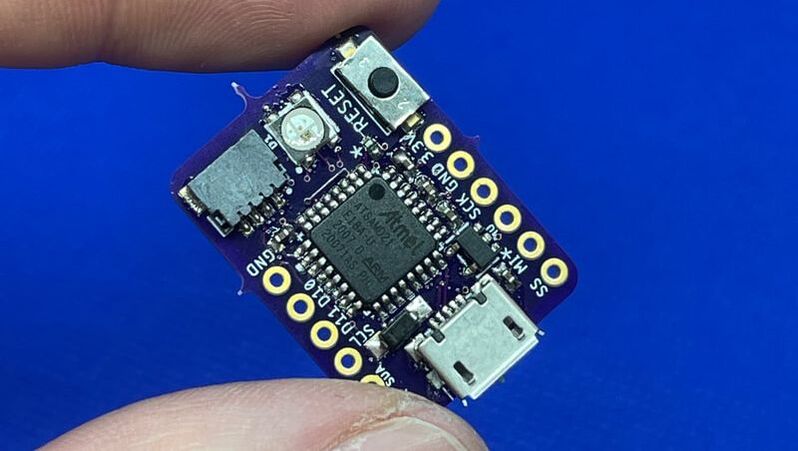
With our new CP Sapling, there is a world of possibilities that you can explore with the SAMD21 microcontroller. And thanks to the hard work of Adafruit, there is a ton of great examples that can be used to explore microcontroller functionality and make a few cool projects to impress your family this holiday season!
As always before we get started, if you have never used a CircuitPython board like the QT PY, be sure to check out Adafruit's learning site to quickly get started with your new board. --> Adafruit Learning Site: Getting Started With CircuitPython 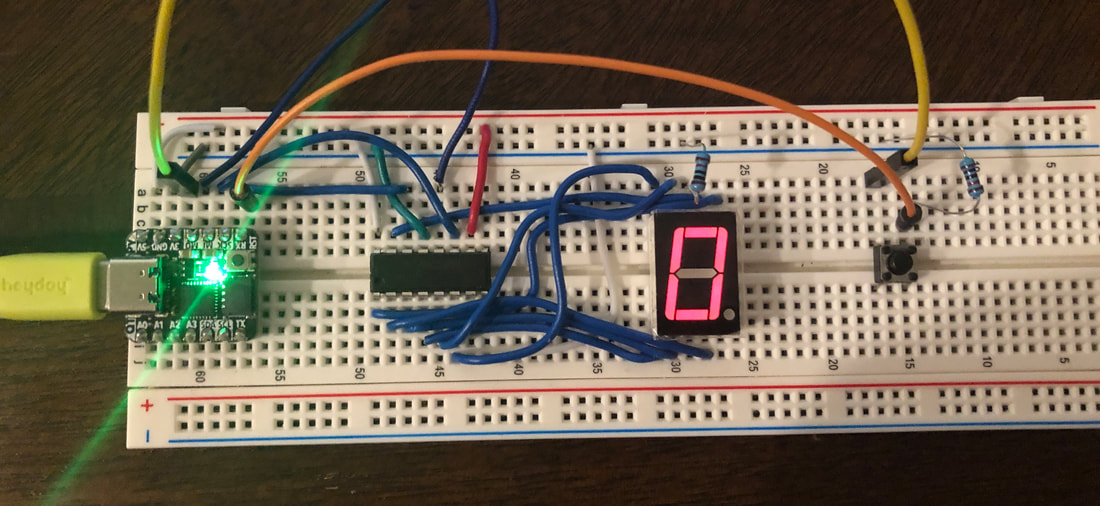
In our last tutorial, we walked you through how to expand the output pins of the Adafruit Qt Py by using a 74HC595 Shift Register. In this tutorial, we'll help you take it a step further by adding a momentary button and a few extra lines of code to implemented a push button counter.
If you haven't seen the first tutorial, you can find it here: https://www.oakdev.tech/tutorials-new-products/tutorial-expanding-qt-py-outputs-with-74hc595 
The Adafruit Qt Py is an adorable development board with a lot of potential given the current price ($6 as of writing this). You might wonder with the small size, what if I need more outputs? In this tutorial we'll show you how you can expand the Qt Py's outputs using the 74HC595 serial shift register to drive a 7 segment display including the CircuitPython code to make it all work.
As always before we get started, if you have never used a CircuitPython board like the QT PY, be sure to check out Adafruit's learning site to quickly get started with your new board. --> Adafruit Learning Site: Getting Started With CircuitPython 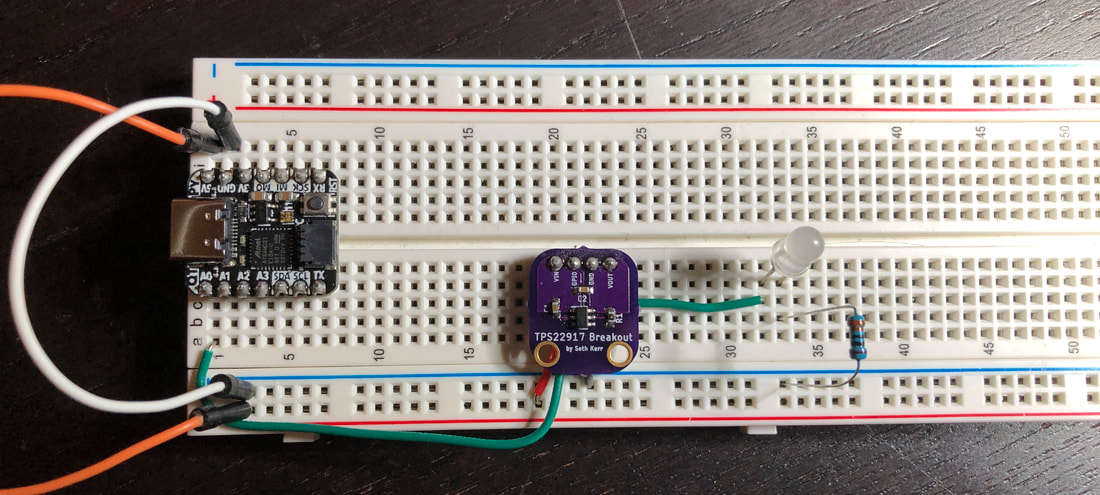
In our previous tutorial with the TPS22917 Acorn, we showed you how to get started with the module using Arduino and the Arduino Nano. In this tutorial, we'll show you how easy it is to get the TPS22917 integrated into your project, all while showing off the new SAMD21 development board the QT PY by Adafruit.
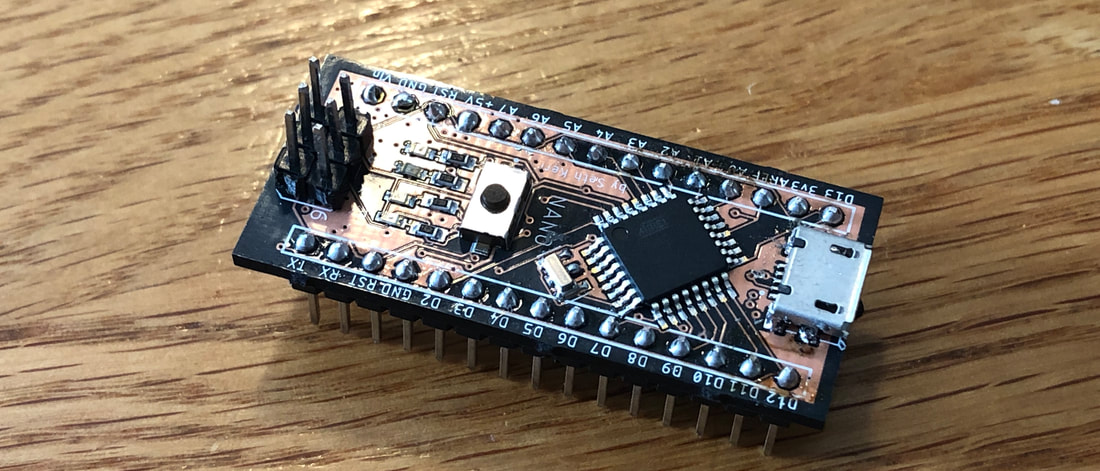 If you're just getting started with designing your own printed circuit boards, or PCBs you might be inspired by the simple to use Arduino Nano, its small form factor, and overall aesthetic to new makers and hobbyists. There's a lot to consider when designing a new board, or even using the DIP package of the ATMega328p. In this tutorial, we will show you the easy way to get your ATMega328p boot loaded and ready to use for your project.
 Trying to figure out how to reduce the power consumption of your project with multiple peripherals can be tricky, especially if these peripherals are operating off different power supplies than your main controller. This is where the easy to use TPS22917 Power Switch/Load Driver from Texas Instruments comes in.
|
AuthorsSeth is embedded software engineer and open source hardware developer. Archives
March 2024
Categories |
 RSS Feed

|
|
Oak Development Technologies (ODT) believes that small teams can make a big difference, like providing you with easy to use designs for your electronics projects. ODT can also support your business with its line of products and kits. We have the right people and tools to bring your idea to life..
Oak tree seeds start small, and so does Oak Development Technologies. Copyright 2018-2023 Oak Development Technologies, An Oak Technology Holdings LLC Company. hello@oakdev.tech | Saratoga Springs, UT 84045 |