
 Trying to figure out how to reduce the power consumption of your project with multiple peripherals can be tricky, especially if these peripherals are operating off different power supplies than your main controller. This is where the easy to use TPS22917 Power Switch/Load Driver from Texas Instruments comes in. Packed into a tiny SOT23 package, the TPS22917 is compact enough to fit into any project, requiring just four total components including the main IC. Combined together on a small breakout board, we then have an easy to use form factor that can be used to easily integrate it right into your project without the extra hassle. In this tutorial we're going to show you how easily it is to use our TPS22917 breakout board in your project. The SetupThe setup is super simple! Here's what you need to get started for this tutorial:
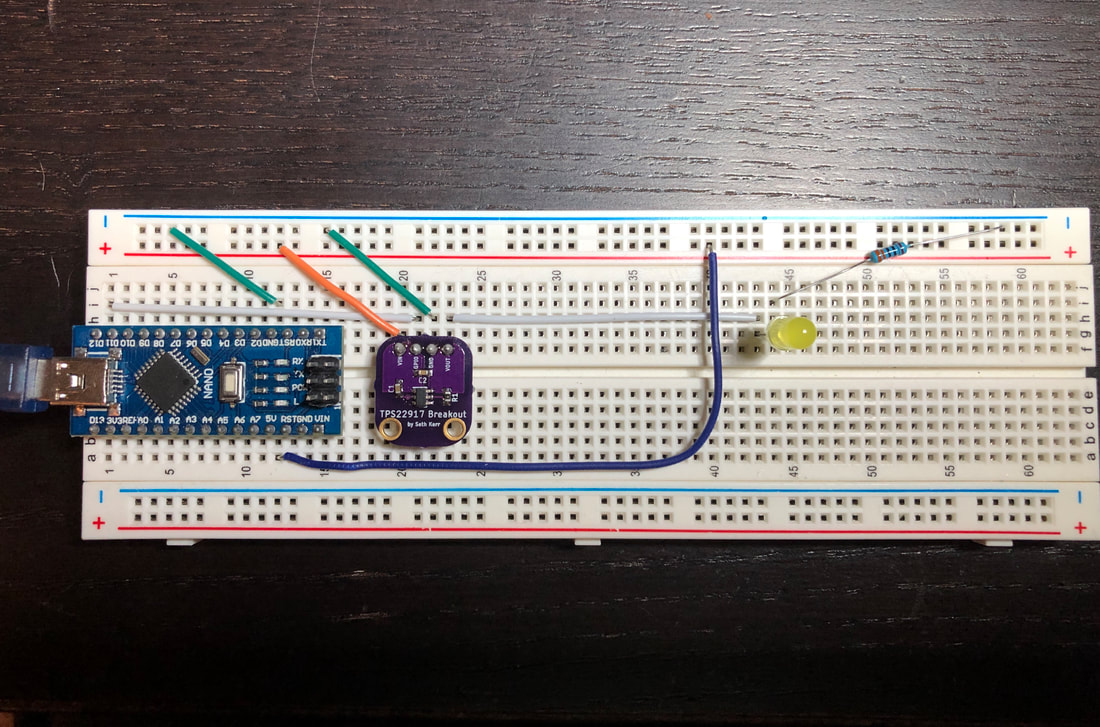
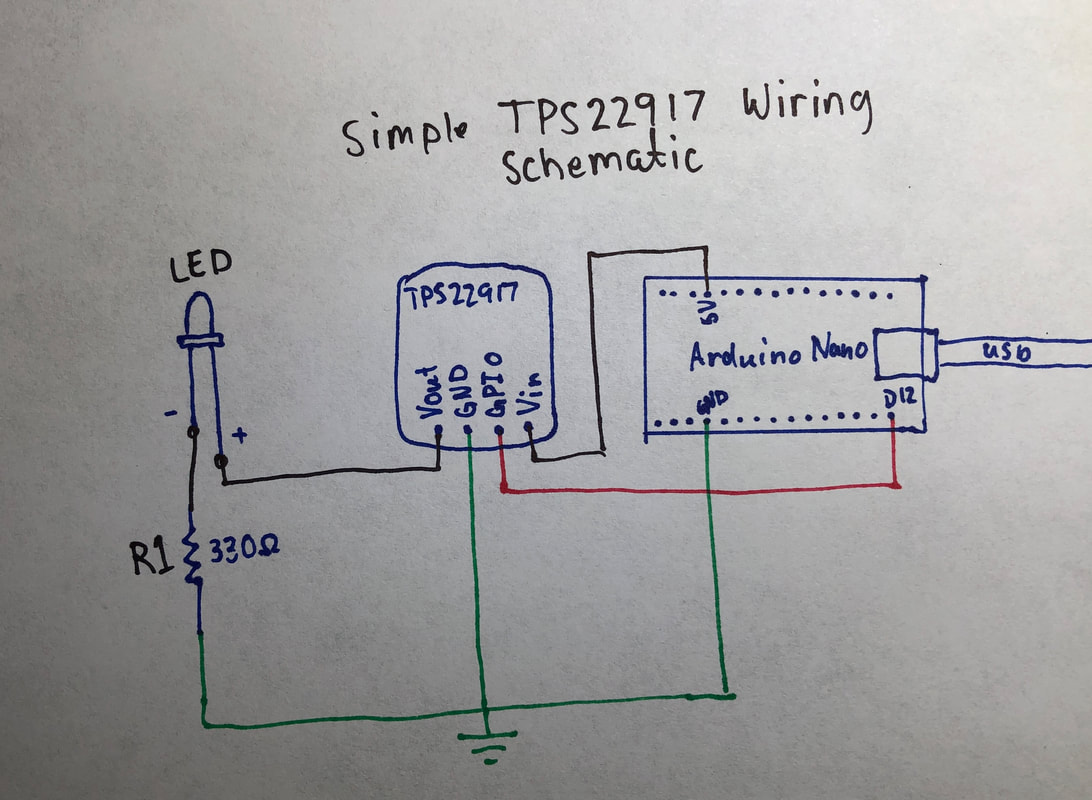
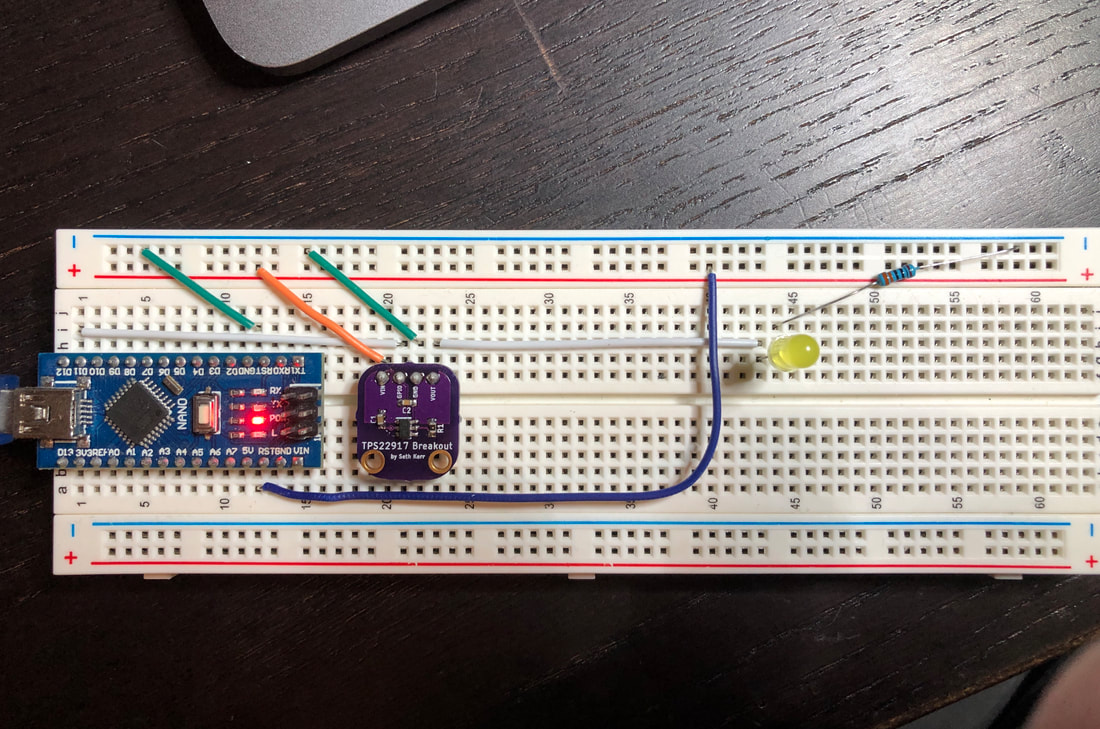
We're then going to wire up the circuit like in the following picture and schematic.
After the circuit is wired up, we will then go to the Arduino IDE to code what we need to operate the breakout and the LED together. When you open the Arduino IDE, type in the following code into the editor, or download Tutorial.ino file from GitHub. 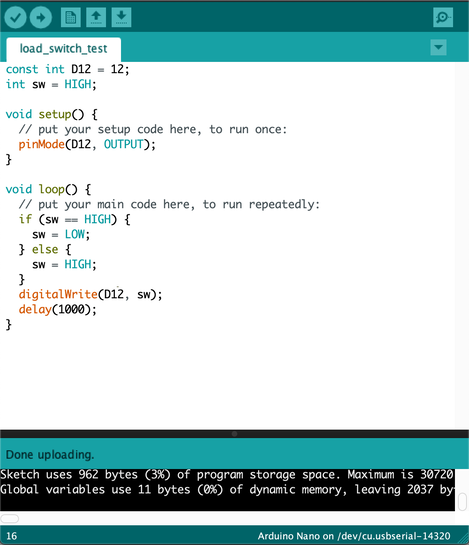 Here's what's going on in the code:
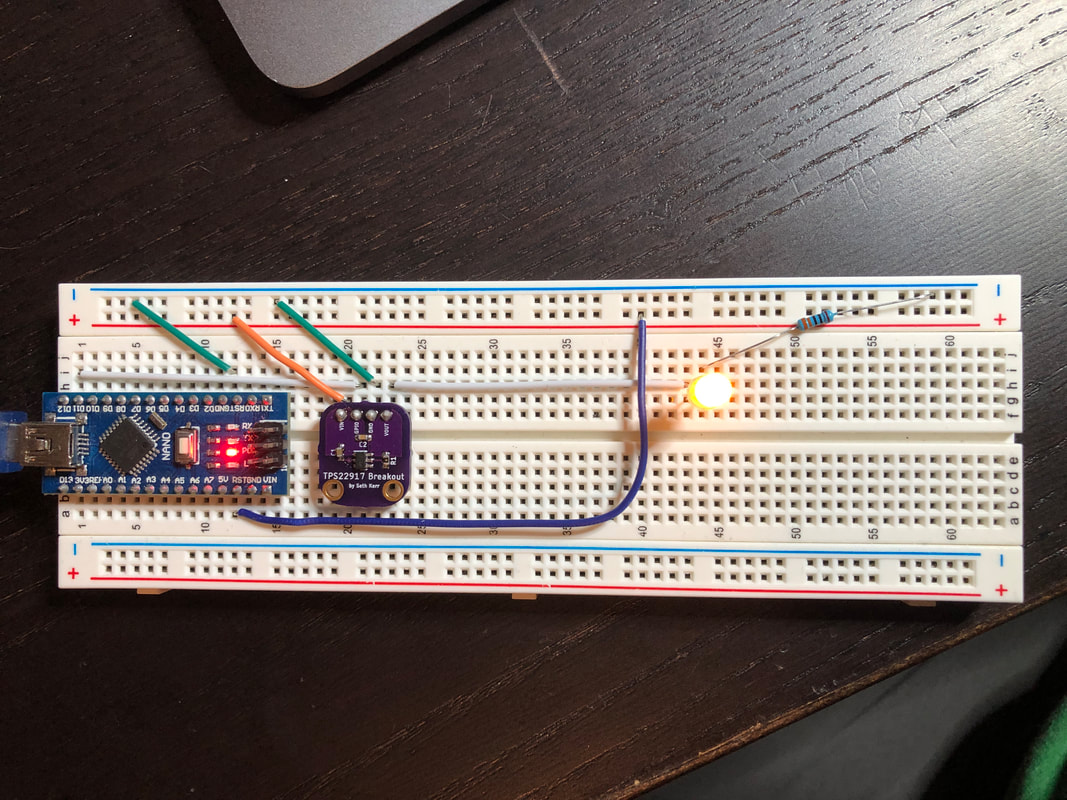
We will the go to the tools menu and select our board, and the USB port the board is connected to. 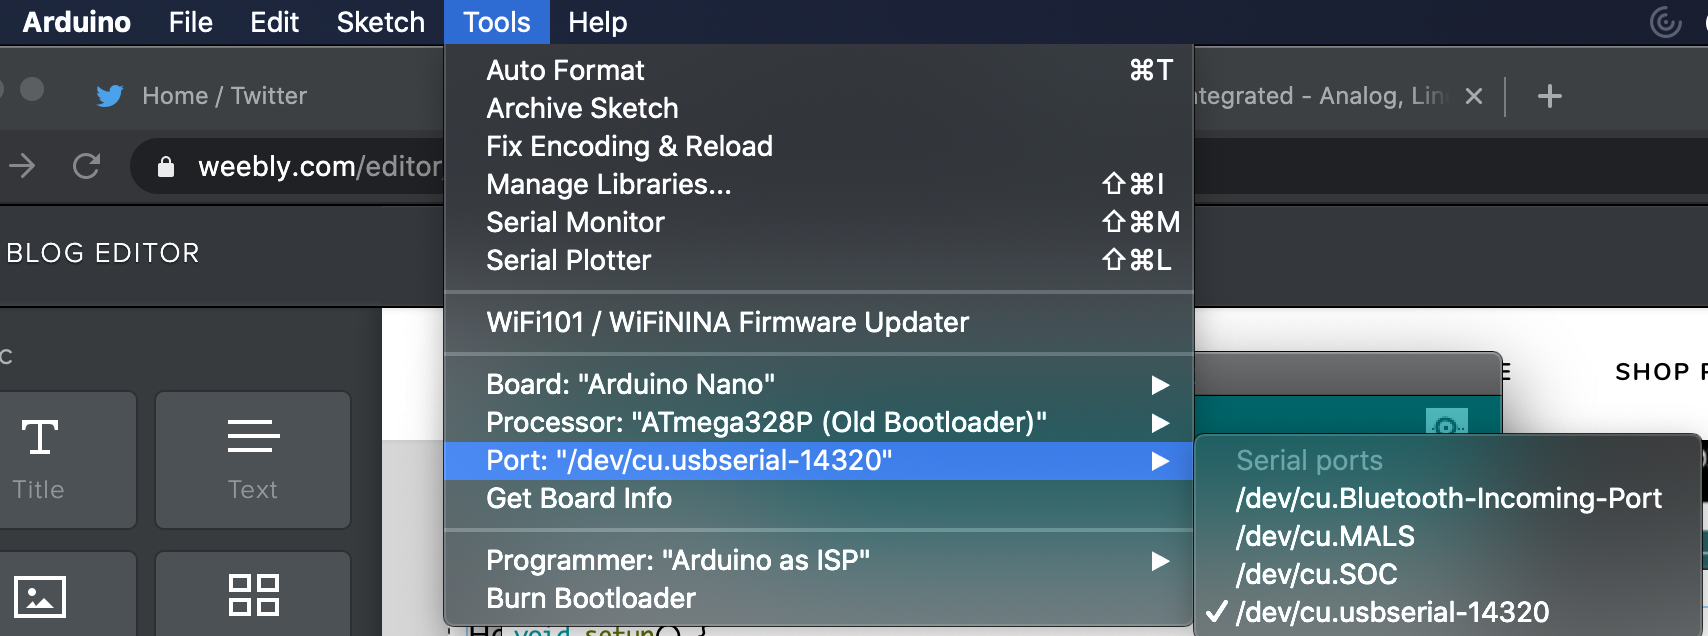 After that, we will press the upload button. If you have any issues, try changing the "Processor" in the tools menu. The final result should be the LED blinking on and off every second. We hope you enjoyed this tutorial. Please leave a comment, share, and come back for new tutorials! -Seth
1 Comment
devoh
10/17/2020 01:18:03 pm
I am using one for my outside weather station to control power to all the different sensors. I LOVE it. Works great and sips on power. Which is exactly what you need for a solar/battery project. Leave a Reply. |
AuthorsSeth is embedded software engineer and open source hardware developer. Archives
March 2024
Categories |
 RSS Feed

|
|
Oak Development Technologies (ODT) believes that small teams can make a big difference, like providing you with easy to use designs for your electronics projects. ODT can also support your business with its line of products and kits. We have the right people and tools to bring your idea to life..
Oak tree seeds start small, and so does Oak Development Technologies. Copyright 2018-2023 Oak Development Technologies, An Oak Technology Holdings LLC Company. hello@oakdev.tech | Saratoga Springs, UT 84045 |