
(Tutorial) Make A Simple Thermostat With An Adafruit BMP280 Breakout and SAMD21 Microcontroller4/5/2021 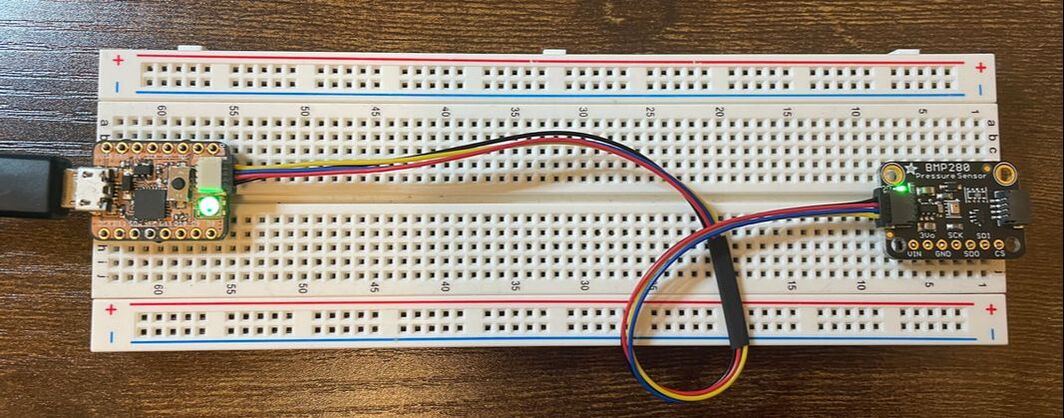
In this tutorial we will go over how to make a simple thermostat using the up coming CP Sapling Rev B and the BMP280 Pressure and Temperature sensor from Adafruit. This simple thermostat will display three simple colors to let you know what the temperature is inside you home or in a specific room. Let's get started!
As always before we get started, if you have never used a CircuitPython board like the QT PY, be sure to check out Adafruit's learning site to quickly get started with your new board. --> Adafruit Learning Site: Getting Started With CircuitPython What You'll Need:
To get started, you'll need the following parts:
Getting Everything Wired Up
All you need to complete this tutorial is to simply plug the STEMMA QT cable into both the development board and the BMP280 sensor. After you do this, just plug your development board into your computer!
The Code:
Like most of the tutorials we have done, the code for this project is pretty simple. There are two main guides that we can use from Adafruit that help us understand how to use the sensors and devices we are using. For this project we will use the following guides to help us use both the onboard neopixel and the BMP280 sensor.
When we combine the examples together we should get something similar to the following:
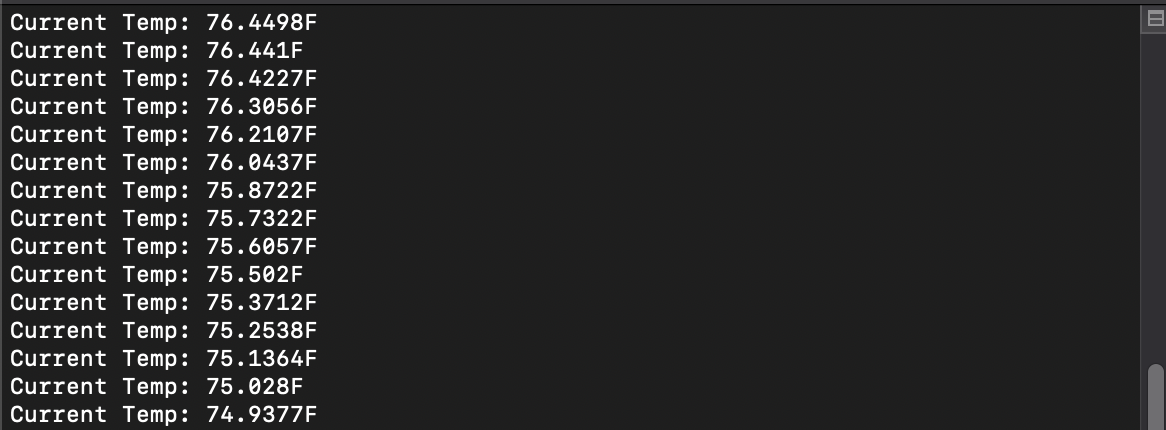
After running the code for a while, we can see a slow stream of output from the microcontroller as it processes the temperature from the BMP280 sensor, but also tests that temperature against ranges we define for the color vs temperature. After a minute or so you should see a nice range of values printed in the console.
The great thing about this example is that using the learn guides for the sensor we're using, we can make a variety of different tools that can be useful to the average person. In the next tutorial we do for this sensor, we will explore making a wearable altimeter.
Final Thoughts
Hopefully this tutorial has given you a few simple ideas of how you can take simple sensors and make useful tools for yourself and your home. Using more powerful boards with additional core modules in Circuitpython, you can make even more complex projects to show off to your family and friends.
0 Comments
Leave a Reply. |
AuthorsSeth is embedded software engineer and open source hardware developer. Archives
March 2024
Categories |
 RSS Feed

|
|
Oak Development Technologies (ODT) believes that small teams can make a big difference, like providing you with easy to use designs for your electronics projects. ODT can also support your business with its line of products and kits. We have the right people and tools to bring your idea to life..
Oak tree seeds start small, and so does Oak Development Technologies. Copyright 2018-2023 Oak Development Technologies, An Oak Technology Holdings LLC Company. hello@oakdev.tech | Saratoga Springs, UT 84045 |