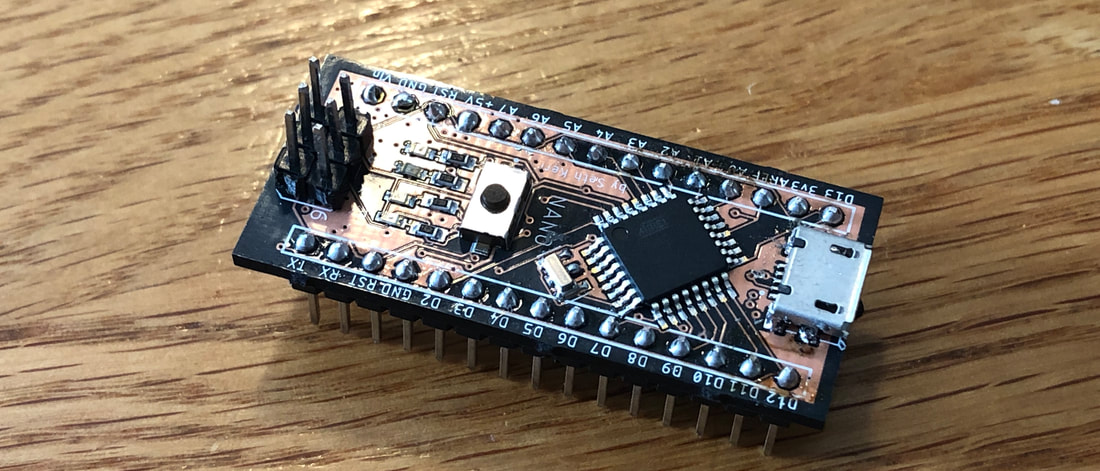
 If you're just getting started with designing your own printed circuit boards, or PCBs you might be inspired by the simple to use Arduino Nano, its small form factor, and overall aesthetic to new makers and hobbyists. There's a lot to consider when designing a new board, or even using the DIP package of the ATMega328p. In this tutorial, we will show you the easy way to get your ATMega328p boot loaded and ready to use for your project. What you needTo get started, we need a few tools to make this work quickly. You'll need:
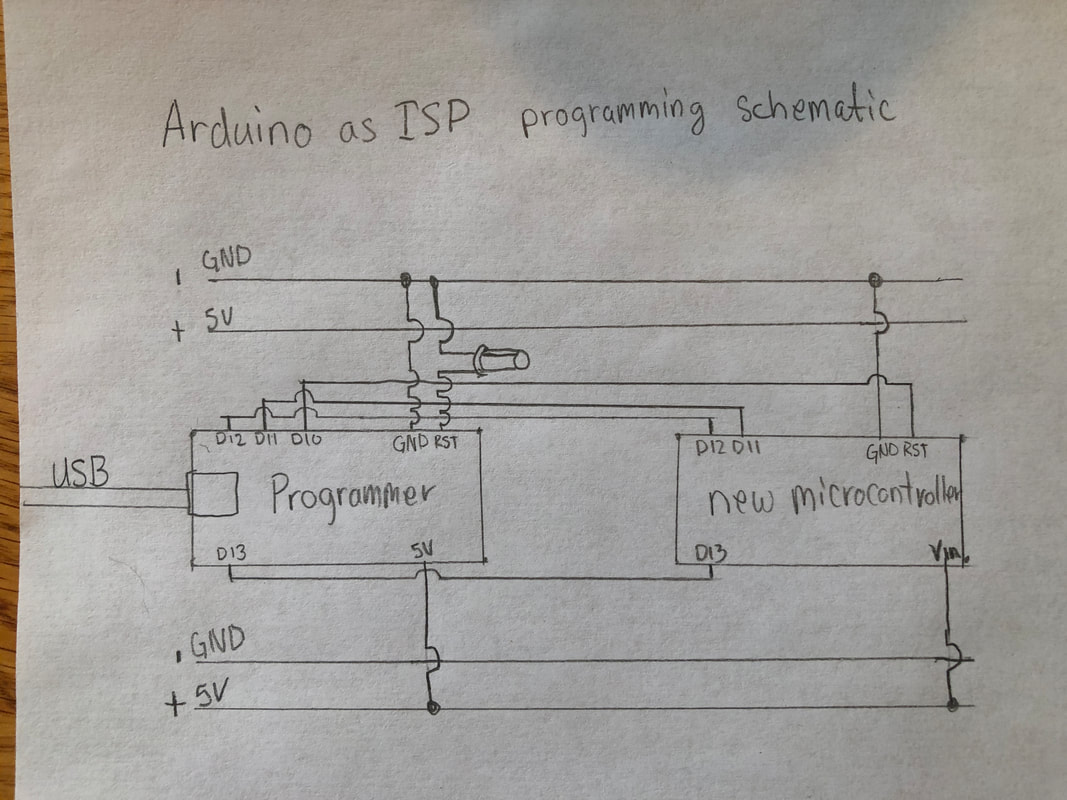
Programming the programmer boardThe nice thing about Arduino, is they can be used to program other Arduino which is what makes them so appealing for makers. To get started, let's open up the Arduino IDE. After the IDE is open, go to File>Examples>11.ArduinoISP>>ArduinoISP.  You should have this in your editor window: 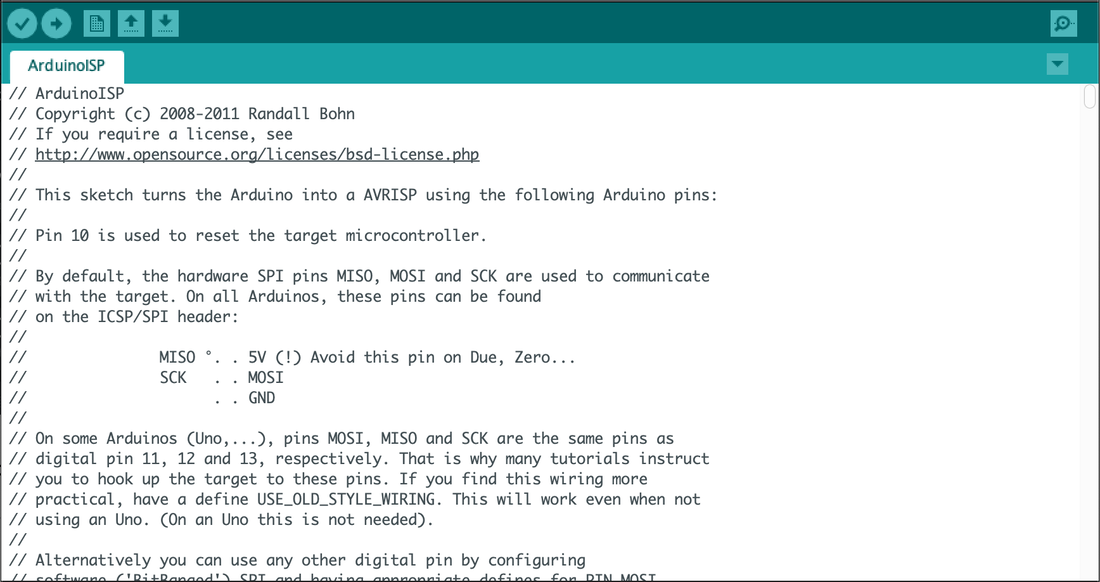 Now we want to program our programming board by pressing the upload arrow in the Arduino IDE, this being the Arduino board you purchased. Be sure to select the right boot loader for your programming board as some Arduino Nano clones use the old boot loader. 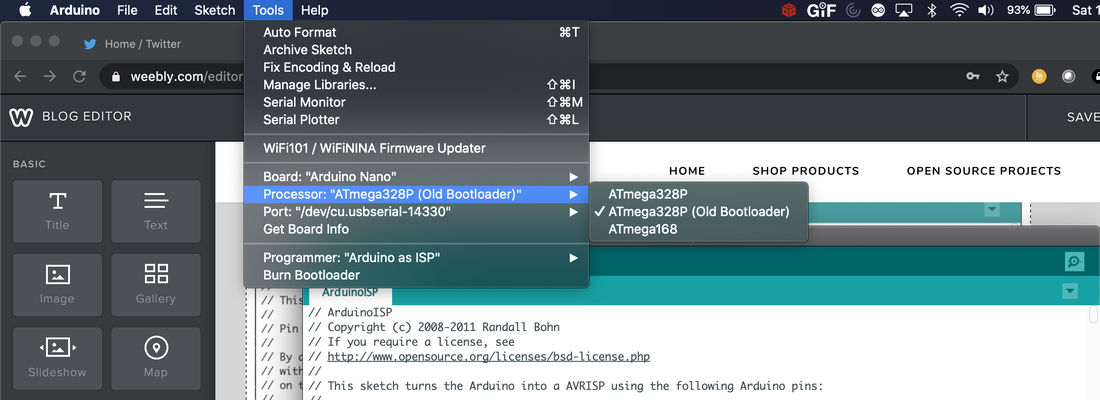 Wiring up to the new microcontrollerThis step isn't always clear for many people looking to burn the boot loader onto a new ATMega328p microcontroller. So we will make sure that these steps are as clear as possible. First, if you made your own Arduino clone, we can wire up the new microcontroller easily, for others who followed a different number schematic, we will cover that in the next tutorial. For those who simply made an Arduino clone follow these steps for wiring:
 The next thing we do is go under Tools>Processor>ATMega328P This ensures we are putting the newest boot loader on the new microcontroller. 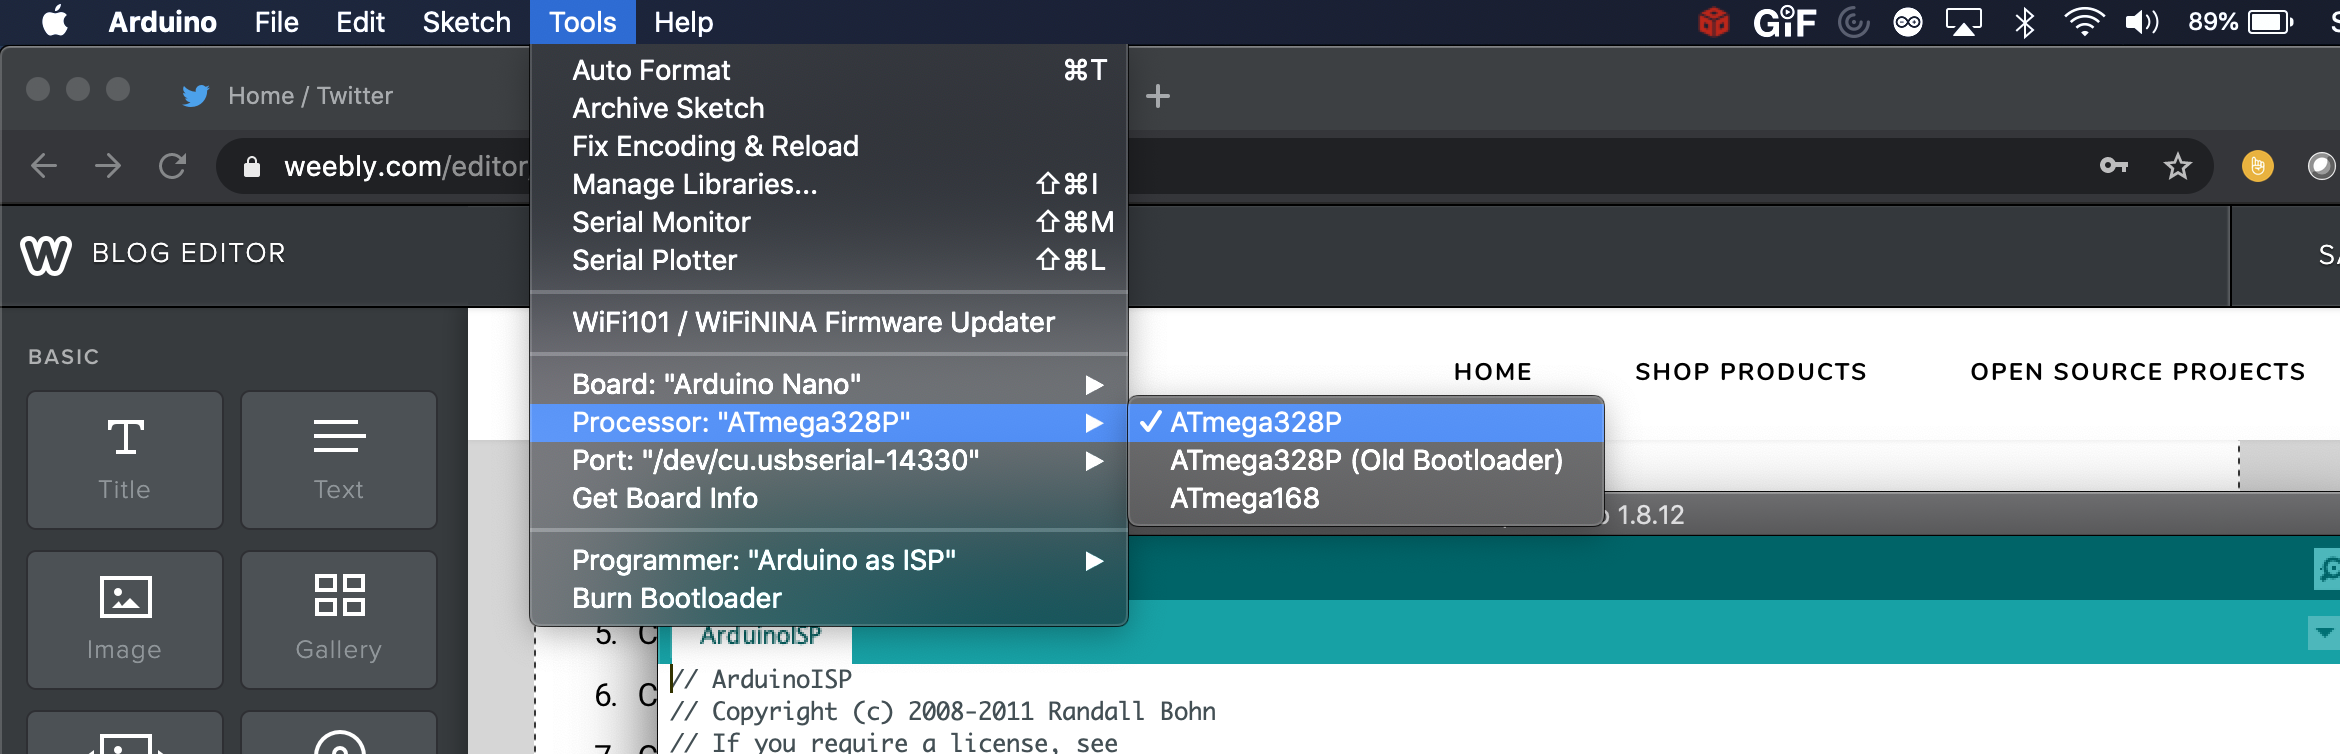 After we do this, we will go under Tools>Programmer>Arduino as ISP Then we will go under Tools>Burn Bootloader. 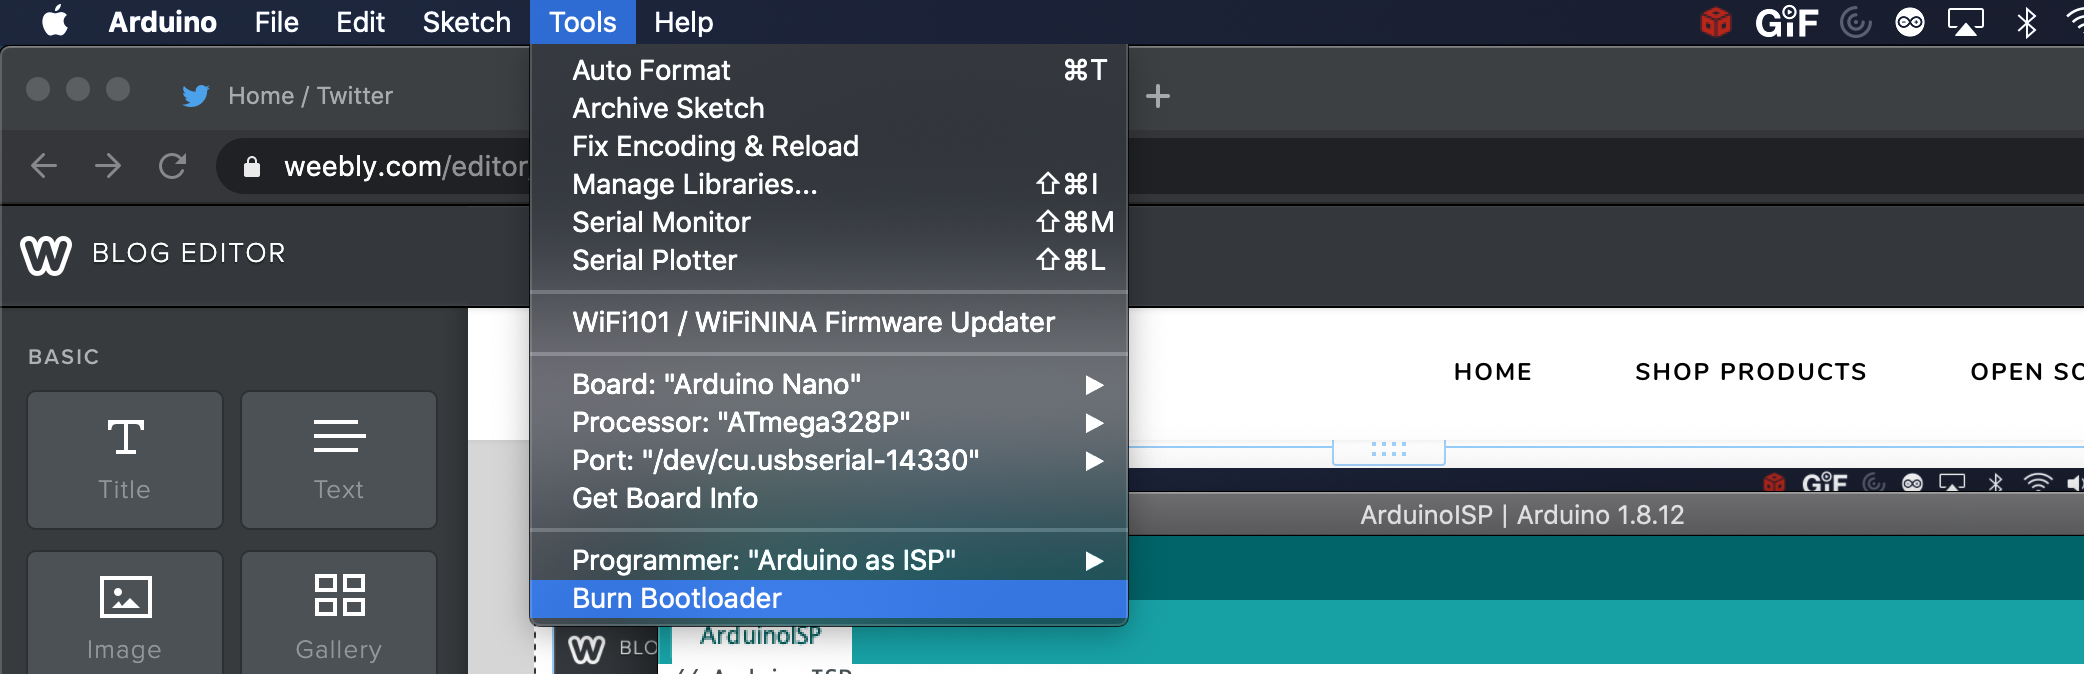 Once the boot loader is done being burned onto the new microcontroller, you will see this message in the console on the Arduino IDE. 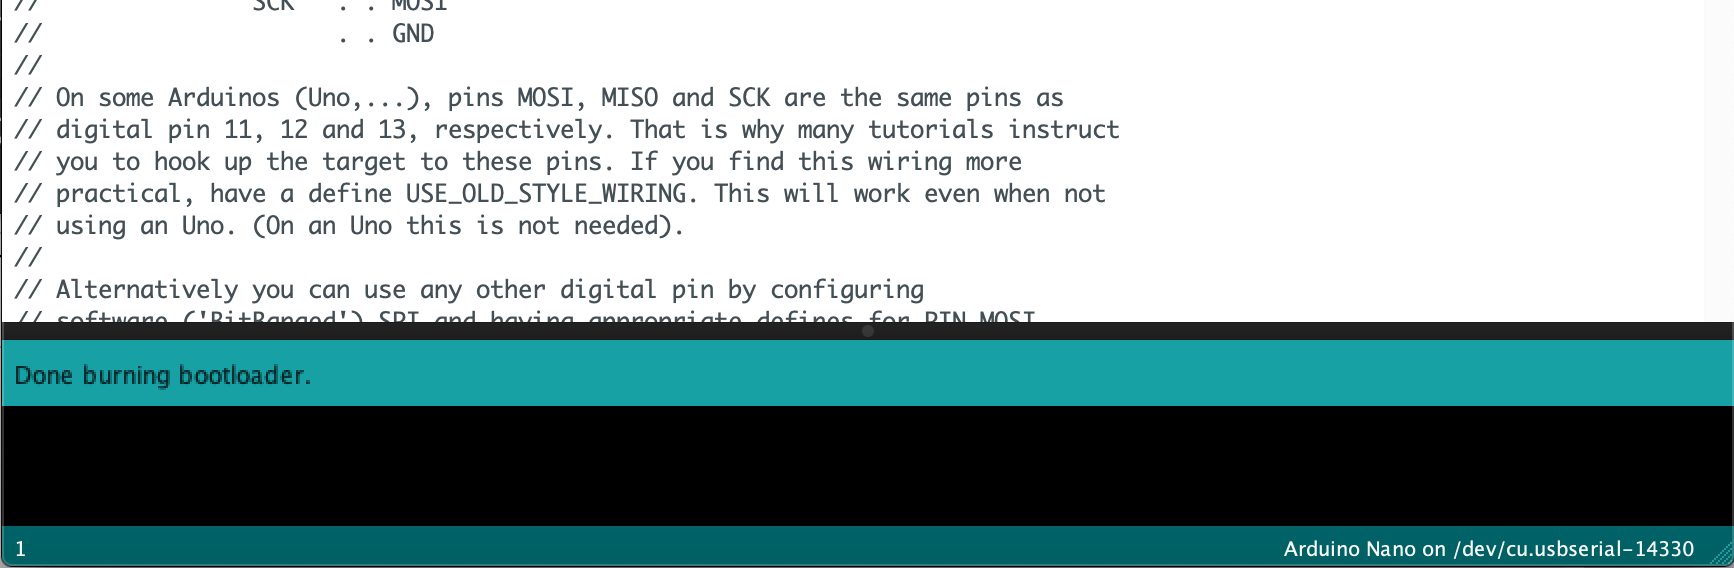 After you do this, you can plug your new Arduino clone into your computer and program away!
Thanks for joining us on this tutorial! We hope this made it easy to get start
0 Comments
Leave a Reply. |
AuthorsSeth is embedded software engineer and open source hardware developer. Archives
March 2024
Categories |
 RSS Feed

|
|
Oak Development Technologies (ODT) believes that small teams can make a big difference, like providing you with easy to use designs for your electronics projects. ODT can also support your business with its line of products and kits. We have the right people and tools to bring your idea to life..
Oak tree seeds start small, and so does Oak Development Technologies. Copyright 2018-2023 Oak Development Technologies, An Oak Technology Holdings LLC Company. hello@oakdev.tech | Saratoga Springs, UT 84045 |